I love blog hops, how about you? :)
I’m honored to be hopping along with Kindred Stamps today as one of their December Guest Designers. It was a challenge which I thoroughly enjoyed. I was sent this adorable mini set called Bless Your Heart. It has a familiar looking “doll” stamp, a microphone (because maybe she is a beloved singer), and several sweet and catchy phrases. I’m thrilled to be one of the first to get to use this stamp set. Thank you, Audra (at Kindred Stamps), for having me join you all this month.
 I created several cards with this stamp set and have two to share with you today. The first is this 6” square card with our “doll” on a stage. She has gold hearts and stars surrounding her and would be great to give a friend to tell them how awesome they are. Because of the holidays I unfortunately didn’t have time to make a video of this card but if I get enough comments of people wanting one I will be sure to do one in the future.
And that brings us to today’s card. I really like the sentiments and decided to make a card using them. My supplies also included a gold mirror heart cut from Lawn Fawn’s hearts dies; the linked hearts die from Paper Smooches; Little Bits Stamp set from Wplus 9; “Always Be Yourself” from the Kindred Stamps Unicorn Stamp set; lobster and pink flamingo inks from Lawn Fawn; Nuvo gold embossing powder; and a selection of sequins in coordinating colors, including the Friendship Mix (which I just love) from Pretty Pink Posh.
*********************************************************************************
YouTube Tutorial
Check out this quick little video to help you recreate it :) Written directions are below. I would love to see what this card inspires you to make. If you post them on Instagram tag #perkypennypapers so I will have a heads up to check it out :)I am attempting to create videos that are short and sweet and to the point. We are all busy and my intention is for you to get as much information and ideas for a project in as short a period of time as possible. This week's video is a double feature:) Let me know what you think in the comments below and be sure to subscribe to my YouTube Channel. It is much appreciated :)
The How To.......
 I stamped two of these cards. The first one is the sample you have been
seeing and the second is the one I am making during the video. Using
my MISTI, I lined up the stamp on the first card, protecting the card
with an acetate sheet, and then stamped on a new card panel. I did each
color individually to streamline the process. To emboss the You’re A
Doll stamp, I put the stamp in the spaces left after stamping the
lobster and pink flamingo and stamped with Versamark. I stamped and
then heat embossed them all at the same time. I freehand stamped the
outer edge with the stamps on a block repeating the process of one
color, then another, and then the Versamark.
I stamped two of these cards. The first one is the sample you have been
seeing and the second is the one I am making during the video. Using
my MISTI, I lined up the stamp on the first card, protecting the card
with an acetate sheet, and then stamped on a new card panel. I did each
color individually to streamline the process. To emboss the You’re A
Doll stamp, I put the stamp in the spaces left after stamping the
lobster and pink flamingo and stamped with Versamark. I stamped and
then heat embossed them all at the same time. I freehand stamped the
outer edge with the stamps on a block repeating the process of one
color, then another, and then the Versamark.Now that I had my sentiments completed, it was time to fill in some of the gaps around my card. To do this I used the Little Bits stamp set from Wplus 9. I took the eight solid heart stamps and placed them on some small blocks and then used the same inks and embossing powder to stamp a variety of hearts on my card. I started with the largest hearts alternating colors and stamping randomly around the page, working my way to the smallest heart which I stamped in Versamark ink and heat embossed with the same Nuvo gold embossing powder I used for the sentiments. I really enjoy this process and sometimes think I could just spend all day stamping little hearts — it’s very relaxing to me.
My original card had a simple black border. I decided with this card I would like to add some more interest and did so using the Waffle Flowers Pinking dies. The largest die in this set cuts a frame of tiny dots into your paper. You can use these to sew in or you can just leave them empty for this nice border detail. I centered the largest die on a piece of 4 1/8” x 5 3/8” black cardstock. This will allow for a very fine white line to be visible around the edge of my card.
I cut the stamped panel down to 3 3/4” x 5” so it would fit within the border detail on my black cardstock. To create dimension I decided to put a piece of fun foam under my stamped panel. I trimmed the fun foam to be slightly smaller than the stamped panel and took my 2” wide Scor-Tape and covered both sides of the foam with it. I then removed the protective strip on one side of the foam and applied the stamp panel. After that I removed strip on the other side of the foam and centered the panel on the black border piece.
Now I was ready to decorate my card. I ran a small amount of glue alongside the back of the linked hearts, attached it toward the bottom of the card, and trimmed off the edge. I then took my sentiment strip which has foam tape on the back and popped it up on top of the linked hearts. After placing the mirrored heart, I finished the card by adding a generous amount of sequins to the front of the card. I had a little oops while I was filming so unfortunately you don’t get to watch me do that. Here’s the final card. What do you think?
****PRIZE ALERT******PRIZE ALERT******PRIZE ALERT*******PRIZE ALERT****
We are really excited about this release! We have 8 new sets being released on Friday! Our collection is quite an eclectic one, with something to attract everyone! What is the set(s) you are most excited about!
One lucky person will win a $10 credit to the shop! Will that be you?
All you have to do, in order to win, is to visit the following blogs and comment on the posts! Easy Peasy! ALSO, one of our Creative Team Members will be giving away a card she created from this release, find out if you are our lucky recipient by heading over to the Kindred Stamps blog!
Kindred Stamps
Fanciful Spaces - Hannah Rubenstahl
R. Winn Creates - Rachel Winn
Card By Salima0705 - Salima Abdullah
The Frolicking Fairy - Marcia Caradinta
Crafty-Angel - Hayley Warren
Perky Penny Paper Arts - Joanne Soukup
DaggDesigns Blog - Molly Dagg
RiCre8s - Rianna Fenning
If
you make a project inspired by this post please tag it with
#perkypennypapers on Instagram and I will be able to see it :) Thanks
again.Fanciful Spaces - Hannah Rubenstahl
R. Winn Creates - Rachel Winn
Card By Salima0705 - Salima Abdullah
The Frolicking Fairy - Marcia Caradinta
Crafty-Angel - Hayley Warren
Perky Penny Paper Arts - Joanne Soukup
DaggDesigns Blog - Molly Dagg
RiCre8s - Rianna Fenning
Thank you so much again for checking out this week's project :)
Have a great weekend :)
Joanne and Penny
Please feel free to share this blog, subscribe and follow me on Instagram at PerkyPennyPapers. It means so much to me and inspires me in my card making.
Supplies List:
 Versamark Ink Shop at: EH | SB | SSS |
 Scotch Foam Tape Shop at: EH | SSS |
 Neenah Cardstock, Neenah Classic Crest Solar White, 25 pk Shop at: EH | SSS |
 Nuvo Deluxe Adhesive Shop at: SB | SSS |
 Tonic Studios - Tim Holtz - 8.5 inch Comfort Trimmer Shop at: EH | SB | SSS |
 Spellbinders Platinum 6 Shop at: SB | SPEL | SSS |
 Inkadinkado Embossing Magic Bag Shop at: EH | SSS |
 Hero Arts Embossing Gun Shop at: EH | SB | SSS |
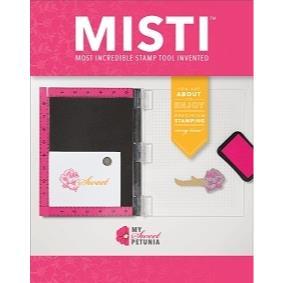 My Sweet Petunia MISTI Laser Etched Stamping Tool Shop at: EH | SB | SSS |
 Tombow Mono Adhesive Dots Dispenser Shop at: SSS |
 Nuvo Embossing Powder - Gold Shop at: SSS |
 Lawn Fawn Ink Cube Pack, Candy Store Shop at: EH |
 Paper Smooches Linked Hearts Die Shop at: EH |
 Lawn Fawn Hearts Dies Shop at: EH |
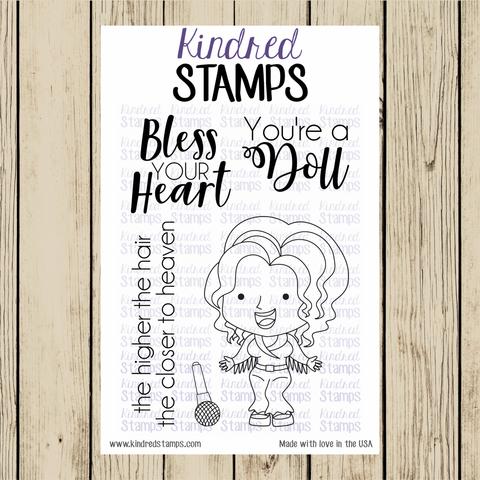 Kindred Stamps, Bless Your Heart Stamp set Shop at: KS |
 Kindred Stamps, Unicorn Stamp set Shop at: KS |
 Waffle Flower Pinking Dies Shop at: SSS |


