Friday, March 30, 2018

Layered Stenciling featuring Tiny Bubbles Stencil from Altenew - AECP Level 1

Welcome :)

Today I am playing with the fun Tiny Bubbles stencil from Altenew to create a project inspired by the Celebration: Stencil Techniques class over at the Altenew Academy.

To create the background I took a rainbow of Altenew Crisp Dye Inks and used sponge daubers to color in my 4 1/4" x 5 1/2" white panel.  I then cleaned off the stencil and got a clean sponge dauber and my VersaMark ink.  I matched my stencil up with the image I had created and then one color at a time layered VersaMark ink over the sentciled bubbles, then removed the stencil, added embossing powder and heat set, until all of the bubbles were colorful and shiny.

I then trimmed my panel down to 4" x 5 1/4" and centered the oval frame of Altenew's Create A Wreath die set on the panel. I ran this through my Crafter's Companion Gemini Jr. and set aside all 3 pieces it created.  I used the same die to cut out frames in pink, orange, yellow, green and purple and glued them together so I could pop up my bubble frame on top of them to create dimension.

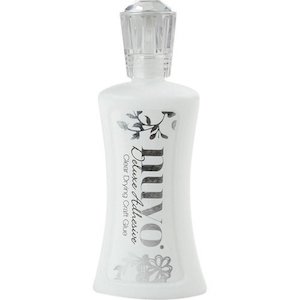
After centering and adhering the rectangle and popped up frame on a 4 1/4" x 5 1/2" card base I went about creating my sentiment.  I used the "Sending You Crafty Hugs" stamp from the Altenew Crafty Life stamp set, stamping it with VersaFine Onyx Black ink and then embossing it with Altenew Crisp Clear Embossing Powder.  I cut it out using the oval frame but this time just kept the stamped and embossed center.  I put Nuvo Deluxe Adhesive behind the sentiment and around the very edges of the oval and then attached it to the remaining stenciled oval and then adhered this to the center of my card.

I love how this turned out.  I can't wait to try it for a birthday card.  I think I may be addicted to embossing my stenciling now :)
I hope you have fun trying this technique on your own.  If you make a project inspired by this post please tag it with #perkypennypapers on Instagram and I will be able to see it :)  

Until next time,
Happy Stamping :)

Joanne and Penny

Please feel free to share this blog, subscribe and follow me on Instagram at PerkyPennyPapers. It means so much to me and inspires me in my card making.

Supplies List

  • Tombow Mono Sand Eraser
  • We R Memory Keepers Basic Score Board Tool
  • Tim Holtz Guillotine Comfort Paper Trimmer
  • Altenew Stencils, Tiny Bubbles
  • Bazzill 40 lb vellum 8.5 x 11, White, 25 sheets
  • Altenew Crafty Life Clear Stamps Set
  • Altenew Create A Wreath Die
  • Crafter's Companion Gemini Junior
  • Tonic Nuvo Deluxe Adhesive
  • Tsukineko Sponge Daubers
  • Tsukineko Storage Box
  • Altenew Crisp ink in Pinkalicious, Warm Sunshine, Parrot, Starlight, Lagoon, and Deep Iris
  • Versamark Emboss Ink Pad
  • Tsukineko Versafine Onyx Black Ink
  • Altenew Crystal Clear Crisp Embossing Powder
  • Inkadinkado Embossing Magic Powder Bag
  • Hero Arts Embossing Gun (Wagner)

Monday, March 26, 2018

Easy Die Cutting featuring Flower Arrangement Stamps and Dies - Altenew Education Certification Program Project


What a fun course this is.  It is filled with great suggestions for using your dies for different purposes.  I love the added value I feel I get when purchasing the dies because I really can do so much with them.  I am a big fan of die cutting.  Unlike when you use an electronic machine, die cuts create a beautiful finished edge that I just love.  This inlaid technique is one of my favorites.  It's always fun to keep people asking the question, "How did she do that?"

The Flower Arrangement stamp set is another wonderful layering flower set that is great for making beautiful backgrounds for cards.  They are easy to layer and stamp and the color combinations are endless.  I chose the Tea Party, Warm & Cozy, Green Fields sets, and some lovely yellows to create this card.  I then cut the Thinking of You Die from the center of the panel, being careful not to lose any of the center pieces and a piece out of the center of the green card-stock I used to layer this card. I placed the green die cut into the space left when die cutting and filled in all of the spaces with the appropriate pieces. After adhereing the green frame and the panel to a card base I  completed the card by stamping  and die cutting 3 of the smaller flowers, shined them up with a sparkle pen, and popped them up around the card with my Scotch foam tape.

I was left with this very pretty die cut that I can use to make another card.  That's a win, win in my book :)


I hope you have fun trying this technique on your own.  If you make a project inspired by this post please tag it with #perkypennypapers on Instagram and I will be able to see it :)  

Until next time,
Happy Stamping :)

Joanne and Penny

Please feel free to share this blog, subscribe and follow me on Instagram at PerkyPennyPapers. It means so much to me and inspires me in my card making.

Supplies List

  • Altenew FLOWER ARRANGEMENT stamp set and matching dies
  • Altenew Crisp Ink in Mango Smoothie, Warm Sunshine, Tea Party set, Green Fields set, and Warm and Cozy set
  • Neenah Cardstock, 110 lb
  • Altenew Glue Tape Runner
  • 3M Double Sided Foam Tape
  • Altenew Thinking of You die
  • Crafter's Companion Spectrum Noir Sparkle

Sunday, March 25, 2018

Spellbinders March 2018 Monthly Card Kit

Hi everyone :)

I am so excited to have received my first Spellbinders Monthly Card Club Kit. This kit is so full of fun and beautiful product that I wanted to share this unboxing with you so you can hurry on over to Spellbinders and get one. Supplies are limited and the kit is only available during the month of March.

The best part is that everything you need to create cards except for a paper trimmer and a die cutting machine are included in the kit. The dies included in the kit are small enough to fit in a Spellbinders Prizm so this allows to have projects to work on while out of town with a minimum of packing. This is something I am always looking for.

Check out the video here......

.....and then after the supplies list there are 10 cards with recipes to inspire your creating.

 
Supplies:

Nuvo Deluxe Adhesive
Shop at:
SB | SSS
Tim Holtz 8.5 Paper Trimmer
Shop at:
EH | SB | SSS
Spellbinders Platinum 6
Shop at:
SB | SPEL | SSS
Tombow Dots Tape Runner
Shop at:
SSS
Spellbinders Prizm
Spellbinders Prizm
Shop at:
SB | SPEL | SSS
Memento Tuxedo Black Ink
Shop at:
EH | SSS
Spellbinders March 2018 Monthly Card Kit
Shop at:
SPEL
Spellbinders February 2018 Small Die Club
Shop at:
SPEL
Spellbinders Tiny Sentiment Stamps
Shop at:
SPEL


Here are the 10 cards I created using these supplies:

Recipe:
1 A2 card base
4 1/4" x 2" patterned paper
1 strip of gold to die cut border
3 coordinating die cut banners
Chipboard sentiment sticker

--- Recipe ---
1 A2 card base
4 1/4" x 5 1/2" patterned paper
3 3/4" x 2 1/2" gold rectangle
3 flower pieces die cut from gold paper
Acetate sentiment attached to a piece of white
card stock to put on top of gold rectangle
*note: I cut the flowers out of the center of the larger
gold rectangle
--- Recipe ---
1 A2 card base
4 1/4" x 5 1/2" purple paper
4" x 5 1/4" patterned paper
1 piece of matching purple paper die cut
with rectangle die
Heart Wreath Die cut out of gold paper
White satin bow
Sentiment from ephemera set
--- Recipe ---
1 A2 card base
3 3/4" square patterned paper
Heart Wreath Die cut out of gold paper
1 pink die cut banner
Sentiment sticker
Pink flower
Recipe:
1 A2 card base
4 1/8" x 5 3/8" pink paper embossed with flower dies
1 strip of gold to die cut border
1 gold die cut banners cut in half to make it look longer
1 piece of white die cut with rectangle die
1 piece of white and gold patterened paper colored with
coordinating Copic color.
 Chipboard rose
--- Recipe ---
1 A2 card base
Assorted ephemera and chipboard flowers
1 teal green bow
2 coordinating die cut banners
Sentiment from Ephemera set
--- Recipe ---
1 A2 card base
1 1/2" x 5 1/2" patterned paper
1 Acetate Frame
1 ephemera flower bunch
3 coordinating die cut banners
Chipboard sentiment sticker
--- Recipe ---
1 A2 card base
4 1/4" x 5 1/2" patterned paper cut at diagnol
to create a white space for stamping sentiment
1 strip of gold
Coordinating mini hearts from die cutting
Heart Wreath for balloon card
Coordinating rosette
*note: before creating card flip it so it is inside out.
Inside is smoother and better for stamping.
--- Recipe ---
1 A2 card base
2" x 4 1/4" patterned paper
1 strip of gold to die cut border
3 coordinating die cut Heart Wreathes
Sticker sentiment
--- Recipe ---
1 A2 card base
2" x 4 1/4" patterned paper
Coordinating mini hearts from die cutting
Heart Wreath for other cards
1 die cut of largest flower die cut in half to represent leaves
2 flowers from set
Sticker sentiment
See you next time, Happy Crafting!

Joanne and Penny

Saturday, March 17, 2018

Treasure Hunter Pyramid Card with Easy Masking Technique featuring Kindred Stamps


Hi everyone.  I am so happy to share this fun card with you today.  Several people have asked how I created it, so here is a quick video to show you how I created this scene.  I am focusing on how I stamp this one layer card using just stamps, a pen, a ruler, and some Memento tuxedo black ink and will leave the coloring up to you.

I was able to use this awesome sand dunes stamp from the December 2017 My Monthly Hero kit.  I also used a couple of other stamps from the set, the palm trees, this fun little camel train, and the sentiment “Life Is An Adventure”.  The star of this card is this  adorable character from the fun and cheeky Kindred Stamps set Treasure Hunter.  It is part of their new March release that is live at Kindred Stamps now. 

Masking is wonderful but it can be time consuming if you don’t have a die to create your mask with and fussy cutting might be challenging.  This treasure hunter is the perfect example, with his fun lasso flying up in the air.  As is, my only option was to place him on top of the sand dunes.  I did not want to do this.  I wanted him to be in the foreground of our scene with giant pyramids all around him, so I opted to ink up my sand dunes and “delete” part of the stamp with my finger, before stamping.  I like to call this easy masking.  I simply wiped away part of the ink with my finger, until I was comfortable no ink was left to transfer to the paper in that spot, and then stamped.  After stamping the sand dunes, I then inked up my treasure hunter and fit him in the spot I created with my easy masking.  The next step was to fill in any lines that were missing around my treasure hunter.  I did this with a black ballpoint pen.  As you can see it is a very easy process.  And there you have it, the treasure hunter is right there front and center ready for adventure :)

Now to create the fun pyramids.  I simply took a ruler and my black pen, and drew lines to create 3 pyramids.  I started with the right, and drew lines around my treasure hunter first, following the line up to the right corner.  I then centered the middle triangle, drawing the lines as to make the middle triangle seem further back from the first triangle, then repeated the process with my third triangle on the left side.   I added a couple of camels by curving the camel train to fit on the sand dune on my left.  I stamped slightly above the dune and then made the legs slightly longer with my pen so that they lined up with the top of the sand dune.  Solid images like the palm trees work great because you don’t have to worry about the lines showing through, so they automatically look like they are stamped in the foreground.  The  “Life is an adventure” sentiment stamped in the center pyramid was the perfect cap to this scene.

All that is left is to color the image.  I used copic markers in Y15, Y18 and YR23 for the sand dunes and pyramids.  After studying pictures of pyramids in Egypt, I felt there were a couple of different ways I could create the look and feel of this Egyption scene with sand dunes and pyramids.  First the steps on the pyramid, which I created by using my darkest color to flick horizontal lines here and there on each pyramid.  Second was to create the sand, using the lightest color I used in the pyramids and highlighting with the middle color.

I hope I have inspired you to use easy masking to create fun and whimsical scene one layer cards.

Happy stamping :)

Joanne and Penny

Supplies:

Neenah Cardstock
Neenah Cardstock
Shop at:
EH | SSS
Tim Holtz 8.5 Paper Trimmer
Shop at:
EH | SB | SSS
Copic Sketch Marker - BG11
Shop at:
EH | SSS
Copic Sketch Marker - BG13
Shop at:
EH | SSS
Copic Sketch Marker - BG15
Shop at:
EH | SSS
Copic Sketch Marker - B02
Shop at:
EH | SSS
Copic Sketch Marker - B04
Shop at:
EH | SSS
Copic Sketch Marker - Y15
Shop at:
EH | SSS
Copic Sketch Marker - Y18
Shop at:
EH | SSS
Copic Sketch Marker - YR23
Shop at:
EH | SSS
Wescott T Ruler
Wescott T Ruler
Shop at:
EH | SSS
Memento Tuxedo Black Ink
Shop at:
EH | SSS
Kindred Stamps Treasure Hunter Stamp set
Shop at:
KS

Tuesday, March 13, 2018

Kindred Stamps March Release Blog Hop featuring the super cool Treasure Hunter Stamps Set

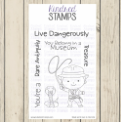
I am so excited to help introduce this wonderful stamp set, Treasure Hunter by Kindred Stamps.  This little guy is larger than life with a whip to keep that cobra away and fun sentiments to create a fun card for someone who loves an adventure.
The first card I created with this stamp set is a fun non-traditional card I created using one
4 1/4" x 5 1/2" piece of white card stock.  I partially die cut a circle out of the top half and then folded the remaining part of the card to create an easel to help it stand.  I die cut a smaller circle and stamped my little Treasure Hunter on it.  I colored him and his backdrop using an assortment of Copic markers. 

To create a background, I took the cobra stamp and stamped it repeatedly on the background with a light gray ink and then stamped the Live Dangerously in Memento Tuxedo Black Ink.  I popped up my adventurer in the middle of the half circle with some foam tape, to complete my card.
Check my blog tomorrow for a video and more information on how I created this card :)

Now, you get to go visit my friends on the Kindred Stamps March Release Blog Hop!  We have 7 stunning sets for you to enjoy this month and believe me, several are on MY wish list.  I can't wait to hear which you love and must have.  Make sure you leave a comment on each blog to be entered into the drawing for a $10 Kindred Stamps store credit!  When you leave a comment, please also include your email address so as to find you easier,  you can do so in a email (at) address dot com format if you prefer!  The winner will be messaged and announced in our Facebook Fan Club!

Good luck, and ENJOY!
            Joanne and Penny :)

And here is the HOP!
Kindred Stamps
Perky Penny Papers  ----------- You Are Here
Mad Crafter's Tea Party
Milene Tiberius
R Winn Creates 
Clown Mom Creations
Scrappy Boy
Dagg Designs Blog
The Frolicking Fairy
Fanciful Spaces

Friday, March 9, 2018

Clean & Simple Boutique Card - Altenew Education Certification Program Project


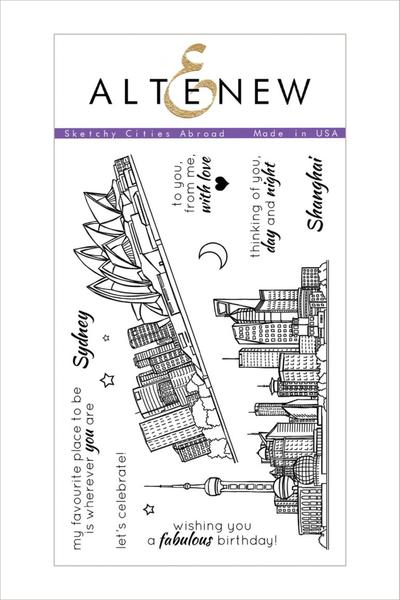
Today's card features a city very near and dear to my heart.  My home town of Sydney, Australia.  This is the first stamp set that I purchased from Altenew.  I was so excited because not only did it have Sydney, it also had Shanghai which happened to be a city I was planning on visiting soon, and that my brother and his family were currently living in.  It is a fantastic stamp set that represents these two cities beautifully. 

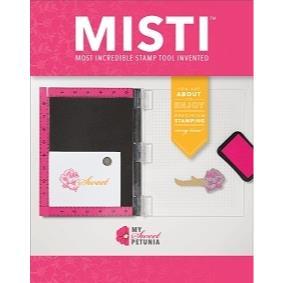
This is a very quick and simple, one layer card.  I did a little stamp surgery on one of the sentiments to create the "my favorite place to be is" stamp and lined it up in my MISTI.  I then took the Sydney stamp and placed that where I wanted it.  I put an A2 sized card into my MISTI and stamped the sentiment.

Using a long acrylic block I stamped the Sydney Skyline stamp just above the sentiment, and then with a ruler and black pen I created a border a short distance from the top of the buildings.  This would create a focal point in which to add some color.  I kept it simple by focusing the color on the natural elements.  The sky was created with a variety of Copic colors that are listed below and then I used a dark and a light green to color the shrubs.  The final touch was to add clear Spectrum Noir Sparkle Pen to the rest of the image.  Unfortunately it doesn't show up in the photos, but it added just the right touch to the card.

Links to all of the products are available below.  Check out Ellen Hutson as soon as you can.  When I am writing this she has Copic Markers at a great price on her website.  The links are below.

Thank you so much for spending your time with us today.  Have a wonderful, crafty weekend!

Love,

Joanne and Penny


Neenah Cardstock
Neenah Cardstock
Shop at:
EH | SSS
Tim Holtz 8.5 Paper Trimmer
Shop at:
EH | SB | SSS
MISTI
MISTI
Shop at:
EH | SB | SSS
Tombow Dots Tape Runner
Shop at:
SSS
Altenew CDI - Jet Black
Shop at:
EH | SSS
Altenew - Sketchy Cities Abroad Stamp Set
Shop at:
EH | SSS
Spectrum Noir Clear Sparkle Pen
Shop at:
EH | SSS
Copic Sketch Marker - BG000
Shop at:
EH | SSS
Copic Sketch Marker - BG02
Shop at:
EH | SSS
Copic Sketch Marker - BG11
Shop at:
EH | SSS
Copic Sketch Marker - BG13
Shop at:
EH | SSS
Copic Sketch Marker - BG15
Shop at:
EH | SSS
Copic Sketch Marker - B02
Shop at:
EH | SSS
Copic Sketch Marker - B04
Shop at:
EH | SSS
Copic Sketch Marker - G03
Shop at:
EH | SSS
Copic Sketch Marker - G09
Shop at:
EH | SSS