Sunday, March 25, 2018

Spellbinders March 2018 Monthly Card Kit

Hi everyone :)

I am so excited to have received my first Spellbinders Monthly Card Club Kit. This kit is so full of fun and beautiful product that I wanted to share this unboxing with you so you can hurry on over to Spellbinders and get one. Supplies are limited and the kit is only available during the month of March.

The best part is that everything you need to create cards except for a paper trimmer and a die cutting machine are included in the kit. The dies included in the kit are small enough to fit in a Spellbinders Prizm so this allows to have projects to work on while out of town with a minimum of packing. This is something I am always looking for.

Check out the video here......

.....and then after the supplies list there are 10 cards with recipes to inspire your creating.

 
Supplies:
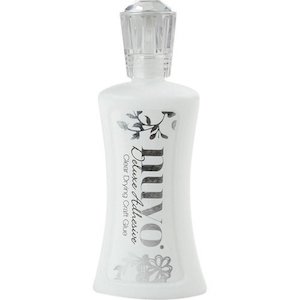
Nuvo Deluxe Adhesive
Shop at:
SB | SSS
Tim Holtz 8.5 Paper Trimmer
Shop at:
EH | SB | SSS
Spellbinders Platinum 6
Shop at:
SB | SPEL | SSS
Tombow Dots Tape Runner
Shop at:
SSS
Spellbinders Prizm
Spellbinders Prizm
Shop at:
SB | SPEL | SSS
Memento Tuxedo Black Ink
Shop at:
EH | SSS
Spellbinders March 2018 Monthly Card Kit
Shop at:
SPEL
Spellbinders February 2018 Small Die Club
Shop at:
SPEL
Spellbinders Tiny Sentiment Stamps
Shop at:
SPEL


Here are the 10 cards I created using these supplies:

Recipe:
1 A2 card base
4 1/4" x 2" patterned paper
1 strip of gold to die cut border
3 coordinating die cut banners
Chipboard sentiment sticker

--- Recipe ---
1 A2 card base
4 1/4" x 5 1/2" patterned paper
3 3/4" x 2 1/2" gold rectangle
3 flower pieces die cut from gold paper
Acetate sentiment attached to a piece of white
card stock to put on top of gold rectangle
*note: I cut the flowers out of the center of the larger
gold rectangle
--- Recipe ---
1 A2 card base
4 1/4" x 5 1/2" purple paper
4" x 5 1/4" patterned paper
1 piece of matching purple paper die cut
with rectangle die
Heart Wreath Die cut out of gold paper
White satin bow
Sentiment from ephemera set
--- Recipe ---
1 A2 card base
3 3/4" square patterned paper
Heart Wreath Die cut out of gold paper
1 pink die cut banner
Sentiment sticker
Pink flower
Recipe:
1 A2 card base
4 1/8" x 5 3/8" pink paper embossed with flower dies
1 strip of gold to die cut border
1 gold die cut banners cut in half to make it look longer
1 piece of white die cut with rectangle die
1 piece of white and gold patterened paper colored with
coordinating Copic color.
 Chipboard rose
--- Recipe ---
1 A2 card base
Assorted ephemera and chipboard flowers
1 teal green bow
2 coordinating die cut banners
Sentiment from Ephemera set
--- Recipe ---
1 A2 card base
1 1/2" x 5 1/2" patterned paper
1 Acetate Frame
1 ephemera flower bunch
3 coordinating die cut banners
Chipboard sentiment sticker
--- Recipe ---
1 A2 card base
4 1/4" x 5 1/2" patterned paper cut at diagnol
to create a white space for stamping sentiment
1 strip of gold
Coordinating mini hearts from die cutting
Heart Wreath for balloon card
Coordinating rosette
*note: before creating card flip it so it is inside out.
Inside is smoother and better for stamping.
--- Recipe ---
1 A2 card base
2" x 4 1/4" patterned paper
1 strip of gold to die cut border
3 coordinating die cut Heart Wreathes
Sticker sentiment
--- Recipe ---
1 A2 card base
2" x 4 1/4" patterned paper
Coordinating mini hearts from die cutting
Heart Wreath for other cards
1 die cut of largest flower die cut in half to represent leaves
2 flowers from set
Sticker sentiment
See you next time, Happy Crafting!

Joanne and Penny

Saturday, March 17, 2018

Treasure Hunter Pyramid Card with Easy Masking Technique featuring Kindred Stamps


Hi everyone.  I am so happy to share this fun card with you today.  Several people have asked how I created it, so here is a quick video to show you how I created this scene.  I am focusing on how I stamp this one layer card using just stamps, a pen, a ruler, and some Memento tuxedo black ink and will leave the coloring up to you.

I was able to use this awesome sand dunes stamp from the December 2017 My Monthly Hero kit.  I also used a couple of other stamps from the set, the palm trees, this fun little camel train, and the sentiment “Life Is An Adventure”.  The star of this card is this  adorable character from the fun and cheeky Kindred Stamps set Treasure Hunter.  It is part of their new March release that is live at Kindred Stamps now. 

Masking is wonderful but it can be time consuming if you don’t have a die to create your mask with and fussy cutting might be challenging.  This treasure hunter is the perfect example, with his fun lasso flying up in the air.  As is, my only option was to place him on top of the sand dunes.  I did not want to do this.  I wanted him to be in the foreground of our scene with giant pyramids all around him, so I opted to ink up my sand dunes and “delete” part of the stamp with my finger, before stamping.  I like to call this easy masking.  I simply wiped away part of the ink with my finger, until I was comfortable no ink was left to transfer to the paper in that spot, and then stamped.  After stamping the sand dunes, I then inked up my treasure hunter and fit him in the spot I created with my easy masking.  The next step was to fill in any lines that were missing around my treasure hunter.  I did this with a black ballpoint pen.  As you can see it is a very easy process.  And there you have it, the treasure hunter is right there front and center ready for adventure :)

Now to create the fun pyramids.  I simply took a ruler and my black pen, and drew lines to create 3 pyramids.  I started with the right, and drew lines around my treasure hunter first, following the line up to the right corner.  I then centered the middle triangle, drawing the lines as to make the middle triangle seem further back from the first triangle, then repeated the process with my third triangle on the left side.   I added a couple of camels by curving the camel train to fit on the sand dune on my left.  I stamped slightly above the dune and then made the legs slightly longer with my pen so that they lined up with the top of the sand dune.  Solid images like the palm trees work great because you don’t have to worry about the lines showing through, so they automatically look like they are stamped in the foreground.  The  “Life is an adventure” sentiment stamped in the center pyramid was the perfect cap to this scene.

All that is left is to color the image.  I used copic markers in Y15, Y18 and YR23 for the sand dunes and pyramids.  After studying pictures of pyramids in Egypt, I felt there were a couple of different ways I could create the look and feel of this Egyption scene with sand dunes and pyramids.  First the steps on the pyramid, which I created by using my darkest color to flick horizontal lines here and there on each pyramid.  Second was to create the sand, using the lightest color I used in the pyramids and highlighting with the middle color.

I hope I have inspired you to use easy masking to create fun and whimsical scene one layer cards.

Happy stamping :)

Joanne and Penny

Supplies:

Neenah Cardstock
Neenah Cardstock
Shop at:
EH | SSS
Tim Holtz 8.5 Paper Trimmer
Shop at:
EH | SB | SSS
Copic Sketch Marker - BG11
Shop at:
EH | SSS
Copic Sketch Marker - BG13
Shop at:
EH | SSS
Copic Sketch Marker - BG15
Shop at:
EH | SSS
Copic Sketch Marker - B02
Shop at:
EH | SSS
Copic Sketch Marker - B04
Shop at:
EH | SSS
Copic Sketch Marker - Y15
Shop at:
EH | SSS
Copic Sketch Marker - Y18
Shop at:
EH | SSS
Copic Sketch Marker - YR23
Shop at:
EH | SSS
Wescott T Ruler
Wescott T Ruler
Shop at:
EH | SSS
Memento Tuxedo Black Ink
Shop at:
EH | SSS
Kindred Stamps Treasure Hunter Stamp set
Shop at:
KS